How to install the Epic Games Launcher on the Steam Deck
No Windows installation or hardcore Linux engineering required
Did you know you can install the Epic Games Launcher on your Steam Deck, using its more readily available tools and settings? For months it’s looked like the only way to get non-Steam games running on Valve’s handheld PC would be to do away with SteamOS and install Windows instead, but there’s actually no need to take such drastic measures if you want your Epic Games Store library and your Steam library side by side.
All credit to Liam Dawe, of GamingOnLinux, for finding (and then updating) this method. I’ve translated it into step-by-step text below, but do go to GamingOnLinux and click on a bunch of articles or something, because I guarantee those videos have got at least 85% of the world’s hardware editors stroking their chins and nodding. Although there are a lot of individual steps, it’s nothing too scary if you’ve ever used a file manager before. And since you’re reading a PC gaming site, I’m assuming you have.
One thing: I strongly recommend grabbing a USB-C hub and using it to connect a mouse and keyboard. Installing the Epic Games Launcher on a Steam Deck is theoretically doable if you use the trackpads for left- and right-clicks, but it’s so, so, so much faster and easier with proper peripherals. And if the Steam Deck is your first PC? Our best gaming mouse and best gaming keyboard guides have some suggestions.
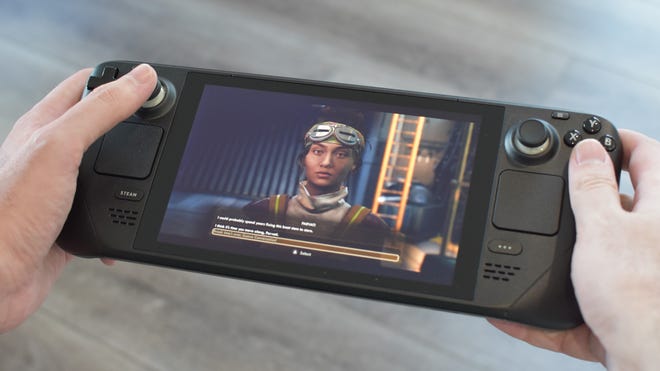
How to install the Epic Games Launcher on the Steam Deck
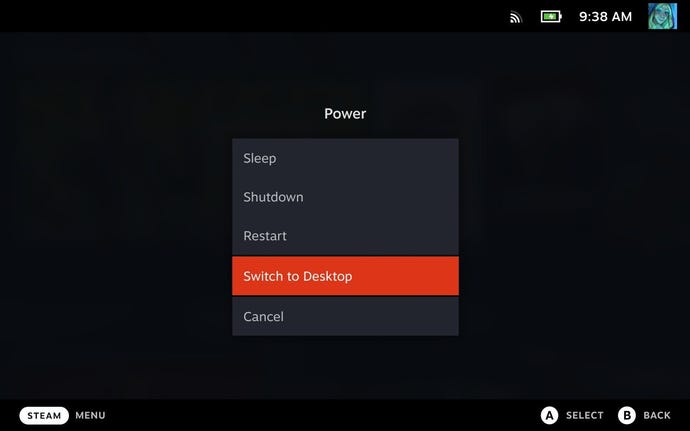
Step 1: Enter Desktop Mode by holding down the power button, then selecting “Switch to Desktop” from the list of options.
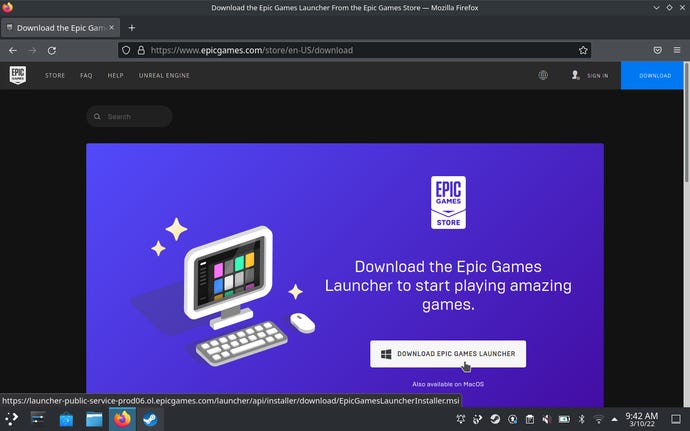
Step 2: Open up a browser (Firefox comes pre-installed), head to Epic Games and download the launcher’s installer. Make a note of wherever you save it to – it should be in Home > Downloads by default.
Step 3: Open up the Steam app, click “Games” at the top, then “Add a Non-Steam Game to My Library”. Just as you may have done loads of times on a desktop!
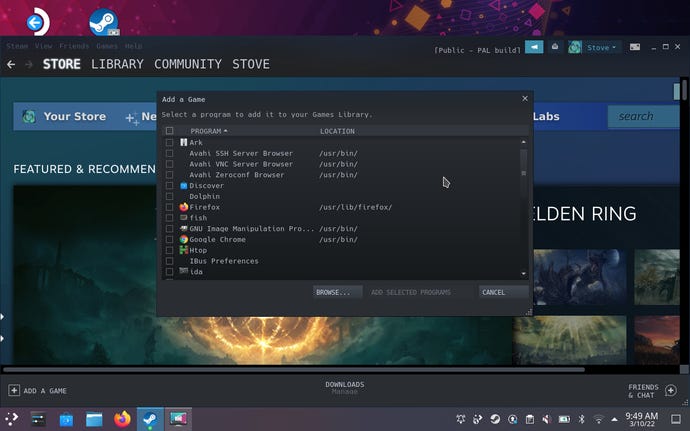
Step 4: The Epic installer won’t initially appear in the list of apps that pops up, so click the Browse button and navigate to wherever you saved it. Make sure the File Type field is set to “All Files” so that the installer can appear at all, then select it and click “Open”. Back in the “Add a Game” window, the installer should now be selected, so click “Add selected programs”.
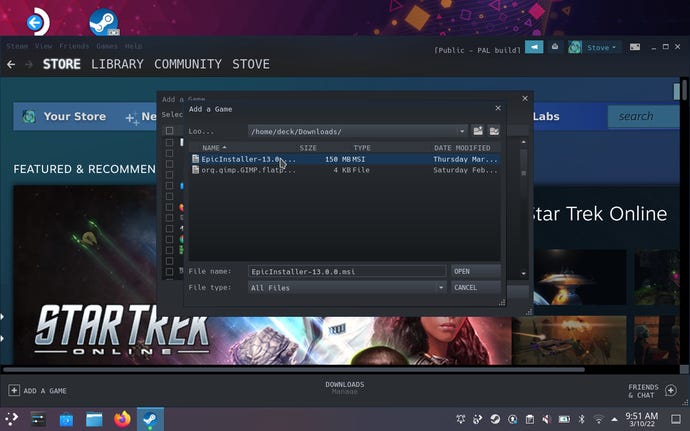
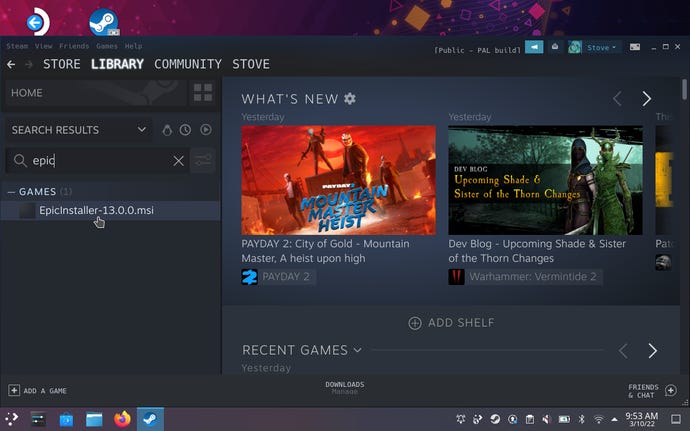
Step 5: Success part one: Steam now recognises the installer. Find it in your Steam library by searching for “Epic”, or just scrolling down through your list of games, then right-click it and select “Properties”. If you’re using the Deck’s trackpads instead of a mouse, pressing down on the left pad registers a right-click. Which sounds odd but also feels totally normal if you’re right-handed? Ergonomics are weird.
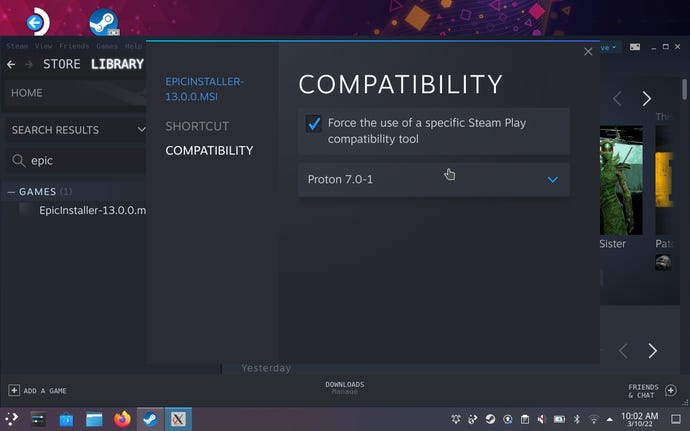
Step 6: In the Compatibility tab of the Properties menu, check the “Force the use…” box, then select the latest installed version of Proton from the drop-down menu below. This will get the Epic Games Launcher running under the same Linux compatibility layer that the Steam Deck uses to get most Steam games running.
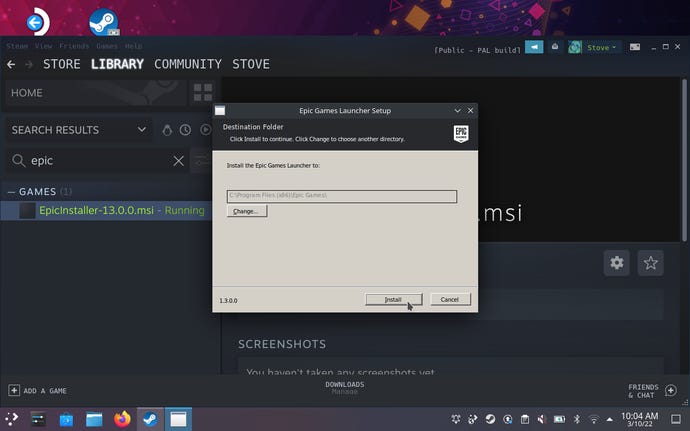
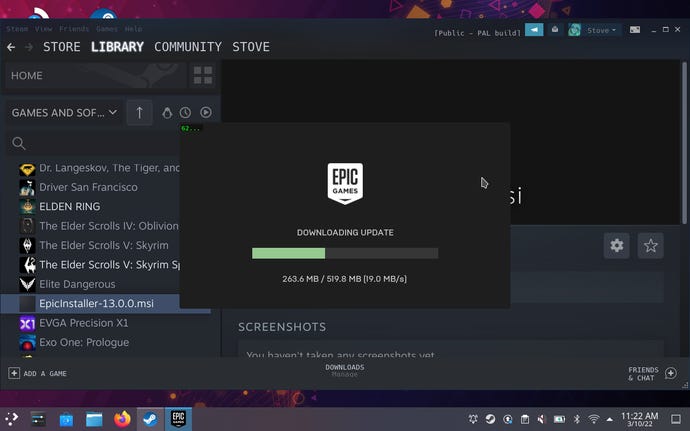
Step 7: Close the Properties window and launch the installer in Steam. Click “Install” in the setup wizard and wait a bit.
Step 8: The next few steps require some spelunking into Steam’s own files. Open up the Dolphin file manager, click the three-line icon in the top-right corner, then select “Show Hidden Files.” Then, navigate to Home > .local > share > Steam > steamapps > compatdata.
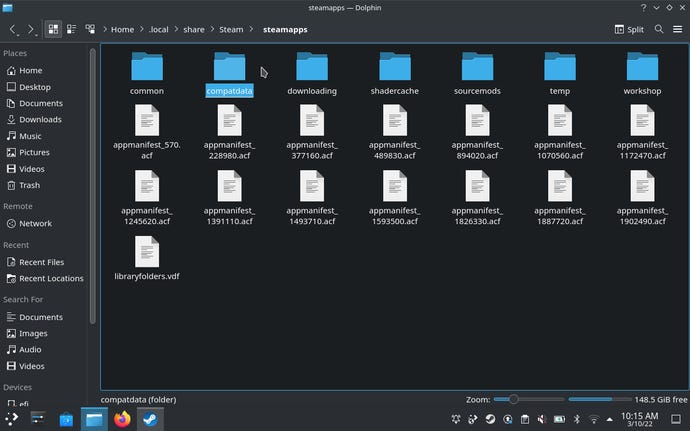
Step 9: Annoyingly, the folder you want is named with a random string of numbers, but as the first GamingOnLinux video points out it should be a much longer string of numbers than the others in compatdata. Open it up, then continue navigating through pfx > drive_c > Program Files (x86) > Launcher > Portal > Binaries > Win32.
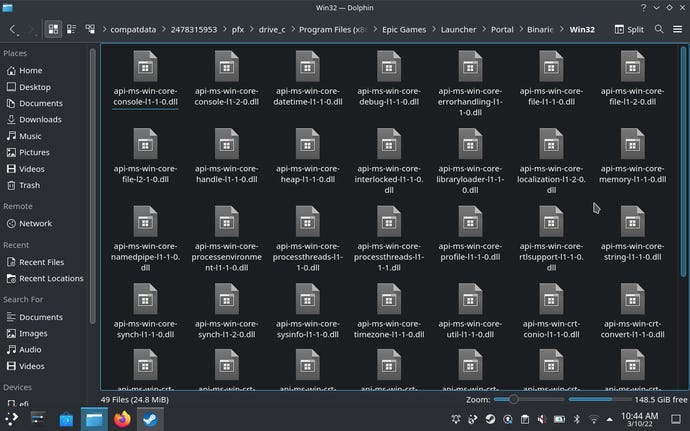
Step 10: Find the EpicGamesLauncher.exe file, right-click it and select “Copy Location” to copy that exceedingly lengthy file path. Then, head back into Steam and right-click on the Epic installer to open its Properties menu again.
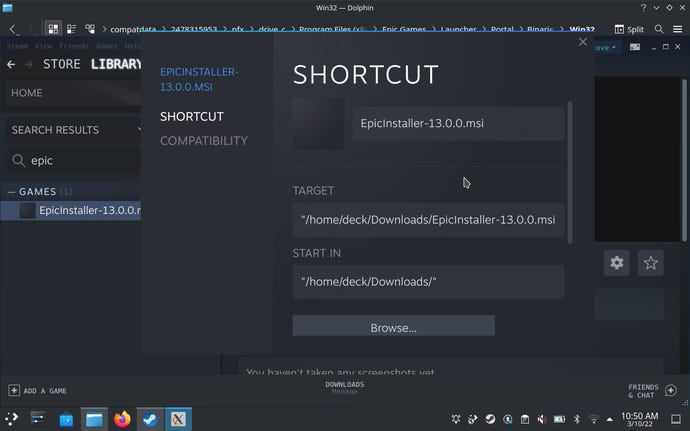
Step 11: In the “Shortcut” field, delete the existing shortcut path (except for the quote marks) and paste in the new one. Do the same with the “Start In” field, except this time, delete “EpicGamesLauncher.exe” from the end of the path. Close the window once you’re done.
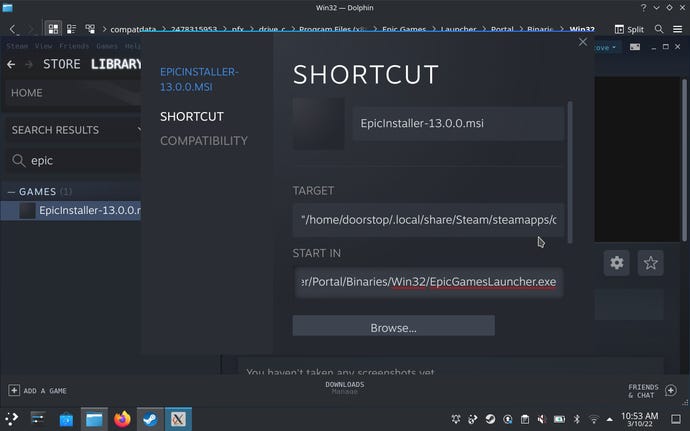
Step 12: Success part two! Launch the installer in Steam again, and there it is: the Epic Games Launcher. After it finishes installing, you can log in with your existing credentials and set about installing games from your Epic library. However, we’re not quite done yet…
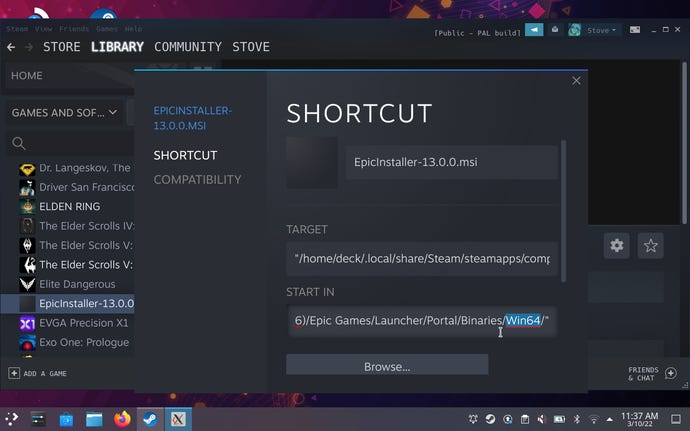
Step 13: Remember how the executable was in a Win32? Once the Epic Games Launcher is fully installed and updated, it creates and starts using a Win64 folder instead, and leaving "Win32" in the Shortcut and Start In paths will break both. Fortunately, you don’t have to deep-dive into those files again to fix this: just open up the installer’s Properties again in Steam, and in both the Shortcut and Start In fields, delete “Win32” and replace it with “Win64”. Close the window and this should keep everything working.
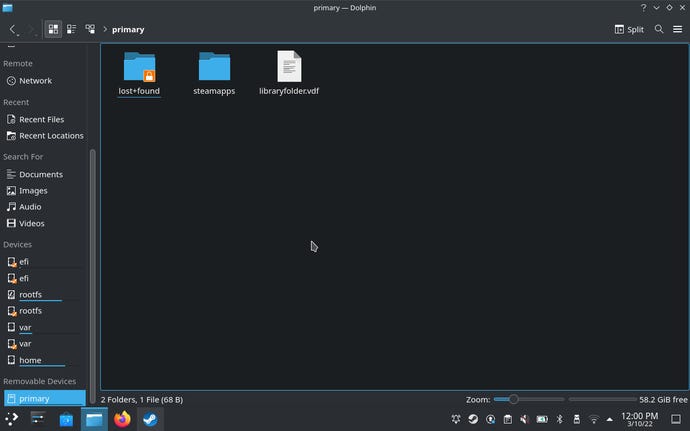
Step 14: The other big issue to address is accessing microSD cards; by default, the Epic Games Launcher can only install games to the Deck’s integrated storage due to a Proton quirk. To fix this, start by opening Dolphin and finding “primary” in the Removable Devices section of the sidebar – this is your microSD card. Click on it.
Step 15: Click near the top of the Dolphin window, where it reads “primary”, to see the file path. Highlight and copy this path.
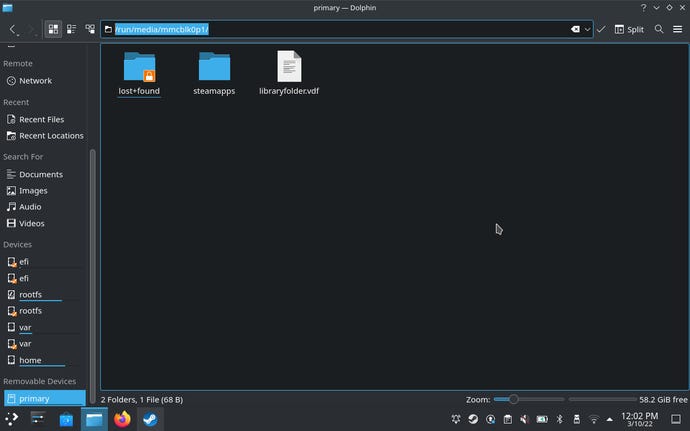
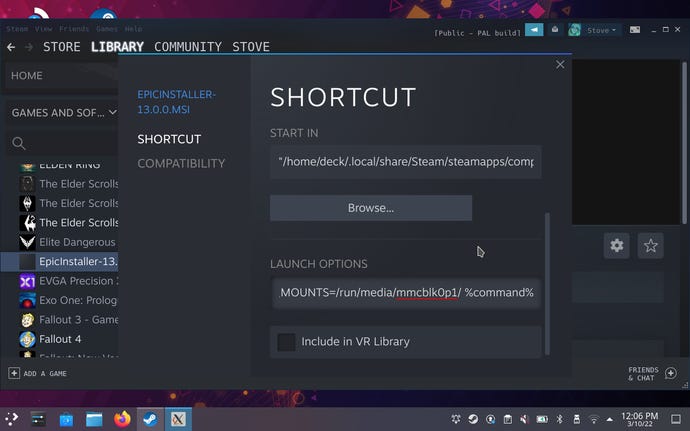
Step 16: Once again, head back into Steam and open the Properties menu of the Epic installer (which at this point is essentially the full Epic Games Launcher). Scroll down to the “Launch Options” field and manually type in (without quotes) “STEAM_COMPAT_MOUNTS=”. Then, paste in the file path, followed by a space, then “%command%” (also without quotes). Close the window and you should now be able to select the microSD as an installation location for Epic game downloads.
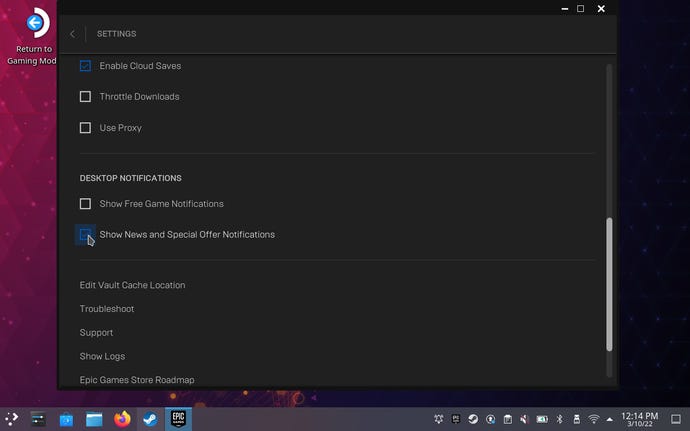
Step 17: One last bit of optional but recommended setup is to disable those pop-up notifications (y’know, ads) that appear whenever you load up the Epic Games Launcher. This is especially important when loading the Launcher from the Deck’s main Gaming Mode, as unlike in Desktop Mode, those pop-ups will mess with the Launcher’s window size. It’s easily done: in the Launcher, click on the circular icon with the first initial of your username in it, then click Settings. Scroll down to the Desktop notification section, and simply uncheck both boxes to nix the notifications.
Getting there is quite the trek, but having access to Epic Games… games on the Steam Deck is absolutely worth the effort. Besides, all it really takes is searching through files and tinkering with Steam settings, which you may well have done before in Windows. You don’t need to be a savant of Linux’s more arcane utilities, like the command line interface.
Of the games I’ve tried, through the Launcher, The Outer Worlds ran flawlessly, so too did Control after a one-time failure to launch. Both work seamlessly with the Deck controls, and don’t interfere with the quick suspend/resume feature. The main compatibility issue will be anti-cheat; Epic have said they’ve no plans to adjust Fortnite’s Easy Anti-Cheat to work on Linux, and getting the Epic Games Launcher to work won’t change that on the user end. Unlike Steam, Epic’s app also won’t track which games are and aren’t compatible with the Steam Deck – but for games available from both storefronts, you could always check our regularly updated list of Steam Deck Verified games. If Valve has granted a game a Verified rating, it should (in theory) work just as well when running it through the Epic Games Launcher.


